A roof ventilation system is a coordinated network of intake and exhaust vents designed to maintain continuous airflow through your attic space, and for Long Island homes it is absolutely essential. Without proper ventilation, heat, moisture, and condensation silently attack your roof sheathing, insulation, and structural wood from the inside out. In a climate zone like ours-where summers bring oppressive humidity and winter brings snow, ice, and freezing temperatures-a well-designed attic ventilation system is the single most important defense your roof has against premature failure.
I’m going to go over residential roof ventilation systems in detail: how they work, what types are available, how to size them correctly, and what problems arise when ventilation is up to snuff. I’m going to focus on the homes on know, those homes in Suffolk and Nassau Counties, where coastal weather, local building codes, and seasonal extremes create unique challenges (I won’t be going over anything dealing with commercial systems).
CLICK NUMBER TO CALL
OR
Understanding Roof Ventilation Systems
Roof ventilation systems are balanced networks of intake and exhaust vents that create continuous airflow through attic spaces, moving stale, moisture-laden air out while drawing fresh air in. When functioning correctly, this airflow cycle prevents heat and moisture from becoming trapped under the roof deck-a condition that leads to several problems including mold, mildew, wood rot, damp insulation, and structural deterioration.
For Long Island homeowners, proper attic ventilation is not optional. Our region sits in a transition climate zone between humid subtropical and hot-summer humid continental, meaning we experience the worst of both worlds: summer attic temperatures that can climb dangerously high and winter conditions that promote condensation on cold roof decking. The proximity to the ocean adds salt spray, wind-driven rain, and weather extremes that make a properly designed ventilation system even more critical.
CLICK NUMBER TO CALL
OR
Basic Components: Intake and Exhaust Vents
Every effective attic ventilation system consists of two fundamental components working in tandem.
Intake vents are installed low on the roof-typically at the soffits or eaves-to pull in cool, dry air from outside. Soffit vents provide critical intake ventilation for attics and are the most common intake solution. Without adequate intake, exhaust vents simply cannot function as designed. Insulation baffles must be installed at every rafter bay to prevent blown-in or batt insulation from blocking these openings-a problem that is far more common than most homeowners realize.
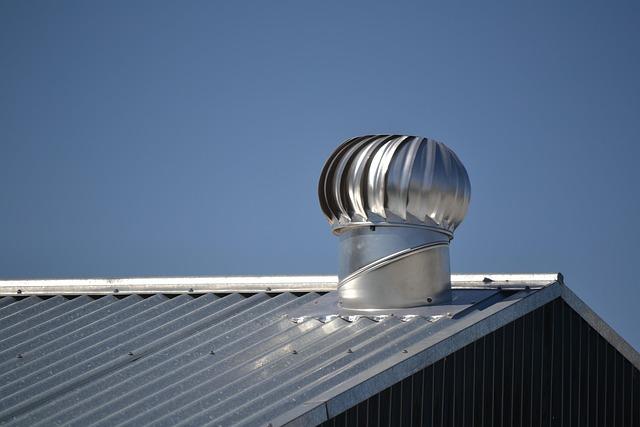
Exhaust vents are located high on the roof to allow warm air to escape. Ridge vents allow heat and moisture to escape at the ridge and are considered the most effective exhaust solution for most roof designs. Other exhaust options include gable vents, static roof vents, turbine vents, and powered attic fans. Each type of roof ventilation serves specific purposes based on roof design and climate.
The explicit connection between these two components is critical: intake vent area should equal or exceed exhaust vent area. A balanced ventilation system requires adequate intake and exhaust airflow. If you install ridge vents but have blocked or insufficient soffit vents, the system creates negative pressure that can actually draw conditioned air from your house through ceiling penetrations, wasting energy and potentially pulling combustion gases or pollutants into living spaces.
How Natural Airflow Works
Roof ventilation relies on the stack effect and wind pressure to move air through the attic. Understanding these two natural forces explains why vent placement matters so much.
The stack effect (thermal convection) is straightforward: warm air rises. As sunlight heats your roof, the air inside your attic space heats up and naturally moves toward the highest available exit point-your exhaust vents. As that hot air escapes through ridge vents or other exhaust openings, it creates a slight vacuum that pulls cooler, drier air in through the soffit vents below. This cycle runs continuously as long as there is a temperature difference between the attic and the outside air.
Wind-driven ventilation supplements the stack effect. As wind moves across a roof surface, it creates pressure differences-positive pressure on the windward side pushes air into intake openings, while negative pressure on the leeward side and along the ridge pulls air out through exhaust vents. On Long Island, where wind is rarely absent, this effect significantly enhances natural airflow beyond what thermal convection alone provides.
The interplay between these forces and moisture is where problems develop. Warm, humid air from bathrooms, kitchens, and laundry rises through the ceiling into the attic. When it contacts cold roof sheathing in winter, condensation forms. Over time, that condensation can cause roof deck swelling and buckling, promote mold and mildew growth, and saturate insulation. Proper ventilation removes this moisture-laden air before condensation can cause damage.
With these principles established, let’s examine the specific ventilation system types available and how each applies to different roof designs.

CLICK NUMBER TO CALL
OR
Types of Roof Ventilation Systems
The natural airflow principles described above drive every ventilation method on the market, but how those principles are harnessed varies significantly. Roof ventilation systems fall into three main categories: passive, active, and hybrid. Your choice depends on your roof’s geometry, your attic size, your local building codes, and the specific climate challenges your home faces.
Passive Ventilation Systems
Passive vents rely entirely on natural airflow-no motors, no electricity, no moving parts. They are the backbone of most residential roofing systems and remain the preferred approach across the roofing industry when roof geometry allows.
Ridge vents combined with soffit vents represent the gold standard for passive ventilation. A continuous ridge vent running along the entire peak of your roof, paired with continuous soffit vents at the eaves, creates uniform airflow along the full underside of the roof decking. This combination provides the most even temperature distribution across the attic and is required by many shingle manufacturers to maintain warranty coverage. For most straightforward gable-style roofs common on Long Island, this is the system to install.
Gable vents are installed in gable ends to enhance airflow and are useful when ridge venting is not possible-such as on homes with very short ridge lines, certain architectural styles, or roofs where the ridge is interrupted by dormers. However, gable vents tend to ventilate unevenly, creating airflow at gable ends while leaving the center of the attic stagnant. They can also allow wind-driven rain and snow into the attic during storms-a real concern on Long Island.
Static roof vents (sometimes called box vents) and other exhaust vent types serve as supplemental exhaust options for complex roof designs. Hip roofs, for instance, have minimal or no ridge length, making continuous ridge vents impractical. In those cases, hip vents-specially designed passive vents that install along the hip ridges-or multiple static roof vents placed strategically across the upper roof surface provide the necessary exhaust. Turbine vents use wind power to extract hot air from attics and can be effective in windy locations, though they depend entirely on wind speed and produce no benefit on calm days; understanding the different types of roof vents and services available on Long Island helps ensure you select the right configuration.
Active Ventilation Systems
When passive ventilation alone cannot move enough air-whether due to roof geometry, large attic size, or extreme heat-active mechanical ventilation fills the gap.
Powered exhaust fans (also called attic fans) are electric units mounted on the roof or gable that mechanically force hot air out of the attic. Most are controlled by thermostats or humidistats that trigger operation at preset thresholds. Powered attic fans can aid in improving airflow in a ventilation system, especially during peak summer heat. However, they carry a significant caveat: if the ceiling plane between the living space and attic is not properly sealed, these fans can draw conditioned air from your house, increasing cooling costs rather than reducing them. They also consume electricity, and that energy use must be offset by measurable cooling savings to justify the investment.
Solar-powered attic fans use solar energy to ventilate attics without drawing utility power. They are particularly appealing for Long Island homeowners facing high electricity rates. Modern solar-powered vents feature panels rated at 35–40 watts and can ventilate 800–1,070 square feet of attic space per unit. Some models offer dual-power capability, switching to mains electricity when solar output is insufficient. These are a sensible middle ground between fully passive and grid-powered systems.
Whole-house fans are not strictly roof ventilation but deserve mention. These large fans, mounted in the ceiling, pull air through open windows and exhaust it through the attic and out the roof vents. They can be highly effective for cooling homes during evenings and shoulder seasons. However, in Long Island’s humid summer climate, they can introduce excessive moisture into the house and attic. They are best considered a complementary cooling strategy rather than a primary ventilation method.
Hybrid Ventilation Systems
Hybrid ventilation systems combine passive and active components to address situations where neither approach alone is sufficient.
A common configuration pairs a continuous ridge-and-soffit passive system with one or more solar-powered fans to boost exhaust during peak heat periods. This is particularly effective for homes with large attic volumes, complex roof geometries with multiple ridges or valleys, or shaded soffits that limit natural intake.
Smart ventilation systems represent the newest development, using sensors to monitor temperature and humidity inside the attic and adjusting fan operation automatically. Products like smart humidity and temperature controllers activate mechanical ventilation only when conditions demand it-during extreme summer heat or when winter humidity spikes-rather than running continuously. This targeted approach optimizes energy efficiency while preventing the over-ventilation that can occur with always-on powered systems.
Understanding which system type fits your home is only half the equation. The next critical step is sizing that system correctly to meet code requirements and actually perform as intended.
Proper Sizing and Professional Installation
Choosing the right ventilation method means little if the system is undersized, unbalanced, or improperly installed. Sizing errors are among the most common reasons ventilation fails, and they often go undetected until moisture buildup, mold, or structural damage reveals the problem, showing up alongside other common roof problems that need quick fixes.
Calculating Ventilation Requirements
Proper sizing is critical for every ventilation system because an undersized system cannot remove heat and moisture fast enough, while an oversized or unbalanced system can create negative pressure that pulls conditioned air from your living space.
Here is the step-by-step process for calculating your home’s ventilation needs:
Measure your attic dimensions. Calculate square footage by multiplying attic length and width. For example, a 40-foot by 50-foot attic has 2,000 square feet of floor area.
Apply the 1/300 rule for minimum attic ventilation. The U.S. FHA recommends 1 sq. ft. of ventilation per 300 sq. ft. of attic. For our 2,000 sq ft attic, that means 6.67 square feet (approximately 960 square inches) of total net free area. However, local codes may require a 1/150 ventilation ratio-the 2024 Residential Code of New York State (RCNYS Section R806) sets 1:150 as the baseline for enclosed attics, requiring 13.33 square feet of ventilation for that same 2,000 sq ft attic. The reduced 1:300 ratio is only permitted when specific conditions are met, including installation of a Class I or II vapor retarder on the warm-in-winter side and proper placement of upper and lower vents.
Split ventilation area between intake and exhaust. Balanced ventilation requires equal intake and exhaust areas-a 50/50 split. Many professionals recommend 60% intake and 40% exhaust to ensure intake vents are never the limiting factor. For a 2,000 sq ft attic under the 1:150 code, that means roughly 8 square feet of soffit intake and 5.33 square feet of ridge or roof exhaust.
Account for net free area ratings. The ventilation area printed on a vent’s packaging is not the same as its net free area. Grilles, screens, flanges, and louvers all reduce the actual open space available for air to pass through. Always use the manufacturer’s published net free area specification when selecting products. If your selected ridge vent provides 18 square inches of net free area per linear foot, you need to calculate how many linear feet of ridge vent are required to meet your exhaust target.
CLICK NUMBER TO CALL
OR
Common Ventilation Problems and Solutions
Even well-designed ventilation systems can fail over time. Blocked vents can trap hot air and moisture, causing mold, wood rot, and structural damage that is expensive to repair. Regular inspections can prevent clogged roof vents and maintain airflow-catching problems before they escalate. Here are the three most common ventilation failures we see on Long Island and how to address each.
Blocked or Inadequate Intake Vents
This is the single most frequent ventilation problem. Soffit vents get blocked by insulation that has shifted or been blown against the openings, by paint applied over perforated soffit panels, by pest nests, or by debris accumulation. When intake is restricted, exhaust vents cannot draw fresh air through the attic, and the entire system stalls.
Solution: Inspect all soffit vents from inside the attic-look for daylight coming through each rafter bay at the eaves. Install insulation baffles (rafter vents) in every bay to create a permanent air channel between the insulation and the roof sheathing. If your home has solid soffits without vents, have continuous perforated soffit panels installed or add individual soffit vents at regular intervals. The goal is ensuring intake vent area equals or exceeds exhaust vent area across the entire attic footprint. Ensuring proper attic insulation is installed without obstructing airflow is equally important.
Ice Dam Formation in Winter
Ice dams form when heat escaping through the ceiling warms the roof deck, melting snow on upper roof surfaces. The meltwater flows down to colder eaves, refreezes, and creates a dam of ice that forces water under shingles and into your home. This is one of the most destructive winter roofing issues on Long Island.
Solution: Balance intake and exhaust to maintain consistent attic temperature-the attic should stay close to outdoor temperature in winter, keeping the roof surface cold enough that snow doesn’t melt unevenly. This means sealing every air leak in the ceiling plane (around recessed lights, plumbing vents, electrical boxes, attic hatches) and ensuring insulation meets current building codes for your climate zone. Moisture control through ventilation reduces the risk of mold and wood rot that often accompany ice dam damage. In severe cases, installing ice-and-water shield membrane along eaves during a roof replacement provides an additional layer of protection, and a timely upgrade can also deliver significant insurance benefits when replacing your roof; this is also a smart time to evaluate nearby components like skylights and plan for any needed skylight repair or replacement on Long Island after winter storms.
Excessive Heat Buildup in Summer
When exhaust capacity is insufficient-whether from too few vents, vents in poor locations, or complex roof geometry that creates dead air pockets-heat accumulates in the attic. This superheated air radiates through the ceiling into your living space, driving up cooling costs and degrading roofing materials from below. Shingles lose granules faster, roof decking can warp, and damp insulation loses its effectiveness.
Solution: First, verify that your existing passive system meets the 1:150 net free area requirement and that intake and exhaust are balanced. If they are and heat buildup persists, upgrade to a hybrid approach: add solar-powered exhaust fans to supplement your ridge vents during peak solar hours. For hip roofs or roofs with minimal ridge length, additional static roof vents or hip vents may be needed. Reflective roofing materials and radiant barriers can also reduce heat absorption-studies show that above-sheathing ventilation combined with reflective roofing can reduce heat flow through the roof assembly by up to 65%. Upgrading to architectural roofing systems on Long Island homes can further enhance durability and weather resistance. Balanced ventilation reduces energy consumption and lowers bills, and proper ventilation extends the lifespan of roofing materials by preventing thermal stress.
So, Here’s The Bottom Line
A properly designed and maintained roof ventilation system does more than move air-it protects your Long Island home’s structure from moisture buildup, prevents mold and mildew growth in attics, reduces energy consumption, and extends the service life of every component in your roofing system. Whether your home needs a simple ridge-and-soffit passive setup or a more sophisticated hybrid system with smart controls, the principles remain the same: balanced intake and exhaust, proper sizing to code, quality installation with corrosion-resistant materials, and regular maintenance to keep everything functioning correctly, and homeowners who need to spread out project costs can explore roofing financing options on Long Island with affordable monthly payments or consider premium, long-lasting solutions like Brava synthetic slate roofing for Long Island homes.
A roof ventilation system also enhances indoor air quality by reducing stagnant air in the attic that can migrate into living spaces, making your home healthier and more comfortable in every season.
Here are your immediate next steps, which fit naturally into a simple, stress-free roof replacement process for Long Island homeowners:
Schedule a professional attic inspection. Have a qualified contractor check your intake and exhaust vents for blockages, verify net free area calculations, and assess your ceiling air barrier for leaks. Good airflow prevents mold and mildew growth in attics, and catching problems early prevents expensive repairs.
Request a free ventilation assessment. If you’re planning a roof replacement, this is the ideal time to upgrade your ventilation system-adding ridge vents, improving soffit intake, or installing solar-powered supplemental exhaust during the project costs far less than retrofitting later, especially when you work with the best roofing company in Long Island for high-quality replacements and repairs.
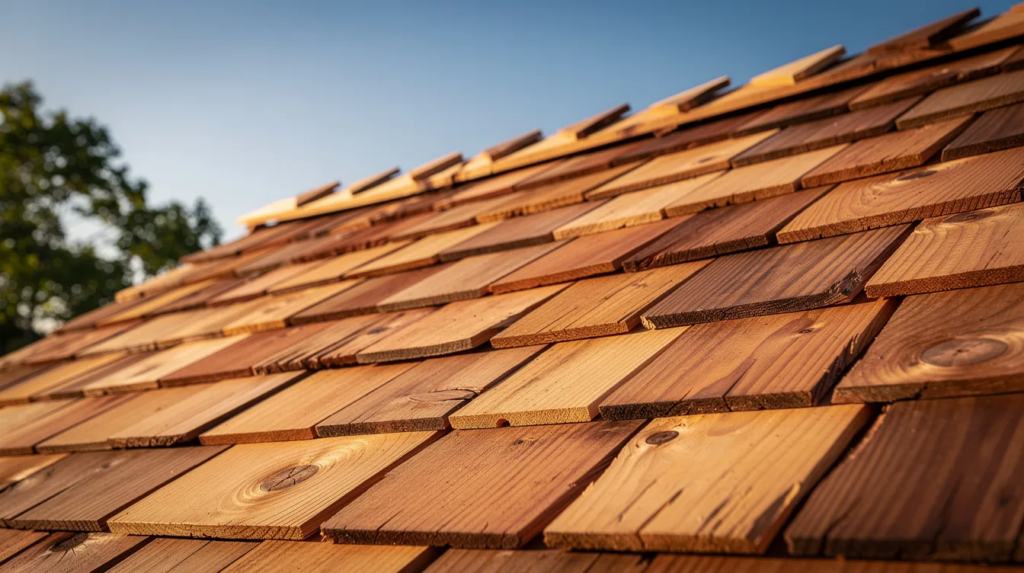
Consider ventilation as part of a comprehensive roof strategy. Pair ventilation upgrades with energy-efficient roofing materials, such as cedar shake roofing for Long Island homes, proper attic insulation, and air sealing for maximum performance and savings, and use a roof replacement pricing calculator for Long Island projects together with a detailed guide to the cost to replace your roof on Long Island and a forward-looking roof replacement cost Long Island 2026 guide to plan your budget effectively.
For Long Island homeowners ready to address their roof ventilation, understanding these systems is the first step. The next is working with a contractor who understands local building codes, coastal climate demands, and the specific challenges that Suffolk and Nassau County homes face every season.
Frequently Asked Questions (These are Just our Experience, Not Legal Advice or Any Kind of Suggestion)
What is the best roof ventilation system for a Long Island home?
For most gable-style homes on Long Island, a continuous ridge vent paired with continuous soffit vents is the best roof ventilation system. This passive combination pulls cool air in at the eaves and pushes hot, moist air out along the entire roof peak, creating even airflow across the whole attic, and it’s required by many shingle manufacturers to keep warranty coverage intact. Homes with hip roofs, multiple dormers, or a short ridge line need a different approach, such as hip vents or static roof vents, since there isn’t enough ridge length for a continuous ridge vent to work effectively.
How many roof vents does my attic need?
Under the current New York State code (RCNYS Section R806), your attic needs 1 square foot of net free ventilation area for every 150 square feet of attic floor space. For a typical 2,000 square foot attic, that works out to roughly 13.33 square feet of total vent area, split about 60% intake (soffit vents) and 40% exhaust (ridge or roof vents) so intake never becomes the bottleneck. A licensed roofer can calculate your exact numbers from your attic’s dimensions and your vents’ published net free area ratings, since grilles and screens reduce the open space below what’s printed on the box.
What are the different types of roof ventilation systems?
Roof ventilation systems fall into three categories: passive, active, and hybrid. Passive systems (ridge vents, soffit vents, gable vents, static roof vents) use no motors and rely on natural airflow, and they’re the standard approach for most homes. Active systems add powered or solar-powered attic fans to mechanically move air when passive ventilation isn’t enough on its own. Hybrid systems combine both, typically pairing a ridge and soffit setup with a solar-powered fan for homes with large attics, complex roof lines, or shaded soffits.
Is roof ventilation actually worth the investment?
Yes. Proper roof ventilation protects both your roof and your energy bills. Without it, attic temperatures can reach 140°F on a 90°F day, which accelerates shingle deterioration and forces your air conditioner to work harder; improved ventilation has been shown to lower peak attic temperatures by about 22°F and cut AC energy use by roughly 6%. It also prevents the trapped moisture that causes mold, wood rot, and ice dams, and keeping it in good repair helps preserve your shingle manufacturer’s warranty.
Can roof ventilation prevent ice dams in winter?
Roof ventilation helps prevent ice dams, but only when it’s paired with proper ceiling insulation and air sealing. Ice dams form when heat leaking from your living space warms the upper roof deck, melting snow that refreezes into ice at the colder eaves. Balanced intake and exhaust ventilation keeps the entire roof surface at a more even, consistently cold temperature so snow doesn’t melt unevenly in the first place. On Long Island, where nor’easters bring regular snow and freeze-thaw cycles, sealing air leaks around recessed lights, plumbing vents, and attic hatches is just as important as the vents themselves.